How to prep with Oil Ground

I've been working on cradled wood panels lately and thought I'd share some quick & dirty instructions on how to prep a board with oil ground. First step is taping off your edges with a thick painter's or drafting tape. I like having the natural wood as my clean edge, you can choose to prep and paint your edges, if you wish, but I like the look and feel of a crisp clean edge. Any excess tape I just fold around the back of the panel since you're just going to take this off when you're done painting anyway. Be sure that the tape edge facing the front of the panel matches up to the edge and that you press it down hard. I've learned the hard way-- don't settle for cheap tape!! It either won't stick and you'll have paint seeping through everywhere or it'll stick too much and literally pull pieces of your wood off...I never thought that was a possibility but it is!


Above is a look at my panels all taped up.

I like using Gamblin Oil Painting Ground (they have a pretty cool video there and tons of technical info if you want to read further). Now, don't get confused... oil ground is very different from gesso. Gesso that is commonly used today is an acrylic base; oil ground is linseed oil based. Acrylic gesso is good, quick, and pretty nice but oil ground trumps it for me because oil ground has a luminosity that really shows through your paint. Since I'm painting in fairly thin layers, I want a ground that will showcase the colors that I've mixed. Oil ground also requires less application of layers and less material so don't be fooled by the price when compared to gesso. If you're prepping on canvas or linen you'll need to size the material, first, with PVA or your choice of sizing. Since I'm painting on wood, there is no need to size.
The only materials that you really need for this job is your painting surface, oil ground, latex gloves, a stick of some sort (I use an old pencil), and an old credit card or gift card. I emphasize old because you're not getting it back from the oil Gods. "Why a credit card," you say? Do you think I'm not going to explain, I will, I will. Oh, and open a window, damn it! This is oil based so you need to properly ventilate your studio.
So put on your gloves and take that pencil/stick and dunk it into the pot of oil ground and then drizzle it all over your surface. It's ok if you put too much on, you can always scrape it off and put it back in the pot during the next step, which is my favorite step.
Take the old credit card and use that to scrape the paint really thinly over the entire surface. A new painting tool!! How cool is that? Be sure to keep the bottom of the card clean in between swipes once it gets a little cakey-- just wipe it off on a towel. A credit card or an old gift card or an old forgotten to be returned hotel room keycard (I swear I thought I returned it) work great because you can put even pressure on it, it's flexible, and you don't have to pay for it! You can also use a roller or a flat sponge brush or something but I really love using the cards for a smooth finish.


Keep doing this until your entire surface is covered with oil ground in a very thin coat. You'll be amazed at how little you use. Let dry for about a day and then put on a second coat in the same way. You can sand with a super fine sandpaper and dust between coats if you'd like a very smooth surface. Let your second coat dry for at least 2-3 days; remember, this is oil paint so it will take some time to completely dry. Then you're ready to paint!

Once your painting is complete, simply remove the taped edges pulling the tape towards the front of the painting.

An extra optional step: If you like having a color to your ground, you can mix any dry painter's pigment into the ground first! Customize the color ground you want to use.

And a word of advice: to keep your can of ground lasting a long time, cut a piece of wax paper to the width of the can and place it on the top of the oil. That'll keep the air in the can from drying it out. Then seal it tightly. This also works for home paint and is a tip I probably learned from This Old House. (If it's latex or acrylic paint, then use a piece of plastic wrap to do the same trick.) I am all about saving you money.

Let me know if you have any questions!


New work


I really have had a great time loosening up and working on this newest grouping of paintings on paper. They helped me work through the larger paintings on board that I've been doing while being completed paintings of their own.

Throughout my years of painting, I've almost always done representational paintings. It's how I learned to paint. It's pretty much all I've known. But I've been so drawn to mark making, movement, and color. And I've also been very moved by non-representational art. I've been wanting to make the move to creating pieces that took the familiar representational aspects out of the composition and just focus on the movement and the color. I'm happy with what's developing and anxious to see where it takes me next.

I've always been a very deliberate painter. I'm happy to let that go and to let the paint and the moment tell me where to go next.

After completing the works on paper I'm holding in the images here, I created this casein painting on cradled wood. It's called "Haywire" and is 16" square.


I'm really excited about this painting -- the layers of casein paint mixed with graphite, litho crayon, and water soluble wax crayons really were fun to work with. There are subtle colors popping through the marks and I'm hoping to explore that more in future paintings.

Never know what will develop at the next studio session!

Casein paintings on paper

A closer look at my new paintings on paper- these are all Casein & Graphite on Arches paper. I've been making them for the Gardiner Art Walk this Friday, May 13th from 5:30-9pm.
If there are any left after the Art Walk, I'll be listing them on my website and Etsy shop.


Rhythm


I've been in a nice rhythm the past few weeks creating new work for an upcoming Art Walk. This is one of my favorite ones so far; it's 15" square and is casein and mixed media on cream Arches paper.

If you'd like to see more, click here and see the rest on Flickr. And if you're in the area, come on by to the Gardiner Art Walk on Friday May 13, 5:30pm to 9pm. I'll be at 307 Water St.

Painting with Casein


The life of a blog tends to have its ups and downs, the moments of dead air and moments of frantic energy. I'm sure you see it in the other blogs that you follow. There are always the "I've been neglecting my blog" posts and they happen every so often for just about everyone that I know.

For me, it happens because I'm working on something new and I'm not yet ready to share those moments and talk about them. I want to see where they go organically and not because I'm forcing myself to share and talk about them.

"So what have you been doing lately," you ask? So glad you asked :)

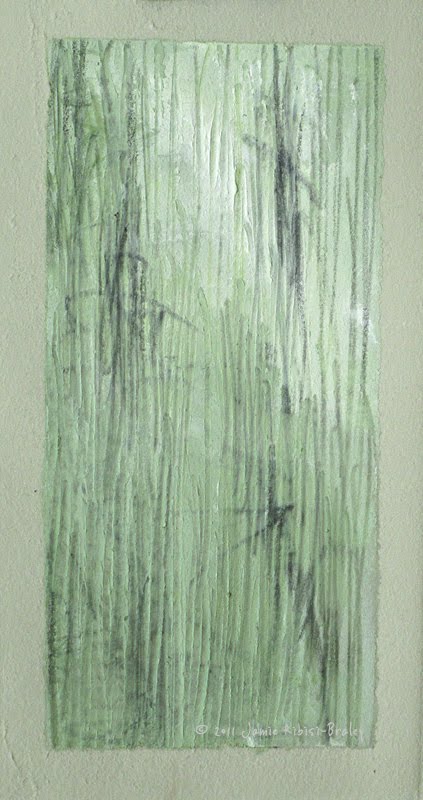
I've decided to explore yet another antiquated medium-- casein. Casein paint is a material derived from milk protein. It's water soluble and very fun to work with. The flow feels like a hybrid of watercolor and acrylic but it is certainly its own beast. I chose to explore it because I was beginning to work drawing into my paintings. I needed something that dried relatively fast but would play nicely with graphite both in the wet and dry phases.

I've been working on both virgin wood and a prepared ground (I'll note the difference in the images posted here); I've found that I prefer the finished look in the ground. Working on a virgin wood, the paint absorbs extremely fast, which is ok but challenging at times. You certainly have to chase the painting a lot harder. Working this way created a pleasing atmospheric quality but the wood wound up getting little areas that were similar to fuzz on a good sweater. Not the look I was going for.

Working on a ground is my preferred way to paint with casein (for now, anyway!) because it gives the painting a luminosity that is unattainable on the bare wood. It also makes the paint flow like a dream. Plus, I really love applying ground to wood. That's my new favorite prep activity. Taping off the edges on the other hand... don't care for it too much.

(above: My Black Eye, 6" x 8"; no ground)

Aggregate, 20" x 24"; ground

Breaking Off The Middle Part, 16" x 16"; no ground

Salad (Tosser), 20" x 24"; ground

More Nature, More Squares

Nature Squares, 6" x 6" each, Encaustic & Photo Transfer

Loving the simplicity of high contrast photo transfers on a bed of wax! I have a total of 15 squares and 4 rectangles. The counting of which led me to wonder the amount of paintings that I made in 2010. Well, folks, I completed 36 paintings! (plus a few that I'm still on the fence about being finished) That's definitely a record for me.

And thinking back to my days in college, especially my senior year, I had a battle with making any paintings. But having inspiration all around you really changes the game. I went to college in Boston and being in a city inspired my drawings and my photography, which I wound up being prolific in those years. But paintings? Yeah, I didn't do much. I did spend my senior year really studying color and mixing oil paint like crazy on my palette. But that doesn't make for finished pieces. I do think that it helped me in my profession, for sure. I'm happy to have spent the time focused on that (although I know my professor thought otherwise).

Anyway... Living in Maine, being surrounded by nature, having a studio space... it keeps me inspired! Looking forward to what the new year brings.

Nature Squares


On this wonderful winter's snowy day in Maine I'm taking some me time to update my Etsy shop and share my new work!


Each painting is 6" x 6" on cradled wood and is painted with encaustic. The images are transfers of my digital photographs done using the Xerox and water transfer method.


Cottage studio


click for larger pic

I've been having some creative blocks and I think the solution may be to change where I'm working. I love the studio inside of my house but I really do love the idea of moving outside---but into a covered area. We have a one room cottage in our yard and I'm very excited to start thinking about transforming it into a real studio. I want a place that I can paint and not worry about the smells lingering. And a studio that I can work LARGE and hang my work on the walls.

So this is the BEFORE photo. This is what we have to work with. It's just filled with some random junk and needs insulation and some simple walls. But I think it's going to be fabulous!


This is a shot showing the loft space up top. I can even take a nap in my studio if I want to! haha

Art in the Barn-- starts tomorrow!


THREE ARTISTS COLLABORATE IN CUSHING SHOW

A wood-carver, a painter, and a jewelry artist will join efforts to produce a show of their work at the Cushing Historical Society Friday - Sunday, July 16 - 18, another of the Arts in the Barn summer exhibition series. The show will open Friday evening, 5 - 7 p.m., at the Society's barn on Hathorne Point Road, and will continue Saturday and Sunday, 10 - 4 p.m.

Cushing resident Bob Matus, boat-builder, carpenter, and lobster fisherman, is a wood-carver in his spare time. As he works he keeps an eye out for interesting wood scraps and pieces of driftwood that have the potential to become such things as mermaids, eagles, or elegant ladles, spatulas and spoons. He markets his carvings under the name Heron Cove Wood Carving, and is represented by several Maine galleries.

Painter Jamie Ribisi-Braley earned a BFA in painting at Boston University. She now resides in Manchester, Maine, where she operates Sweetland Retreat, a retreat for artists, with her husband and sister. She specializes in encaustic painting, a medium that she teaches and uses in her own work.. Her paintings have been shown in galleries nation wide and the State House in Augusta.

Deb Hanson is a part-time Cushing resident who will present her jewelry, and acrylic and oil paintings in the show. Hanson says that she incorporates what she calls the "Colors of Cushing," the unique colors of the St. George River fishermen's buoys, in her work. Her jewelry is fashioned with handmade beads and silver accents that have been inspired by the reflections of the sea.

Admission to the show is free. For more information call 354-8219

**********
If you're in Maine, please attend our Artist's Reception to kick off our Art in the Barn Weekend!
Friday July 16th, 5-7pm. Free local wine and cheese will be served.
**********

Encaustic exhibit opens today!

I'm so excited for the opening of the Luminous Layers exhibition! Even though I can't be there in person, I am there in spirit and in paint :) Two of my painting were accepted into the juried show and I'm so proud to see one of them at the bottom of the postcard that they sent out (pictured above).


I really do wish I could be there-- there are tons of demos and talks. Mostly I would have loved to meet the other artists in person! The online encaustic world is always buzzing with excitement (pun intended) and I feel like I already know everyone but it would be so nice to actually meet them.

Another time, I'm sure!

Powered by Blogger.