Showing posts with label girl scouts. Show all posts

DIY tutorial: COVID protective barriers


Brian and I made two light-weight plexiglass barrier shields for COVID-safe Girl Scout cookie booths! They cost about $30 each in materials at this size. 

The idea is that they are freestanding but they can also be clamped to the table for wind. They are 28x30 plexi with a 3” opening to slide their cookie orders through — I’m calling that the “Covid Cookie Connector”. 


Material list (makes two barriers):

*2 pieces 28x30” plexi (~$19 each)

*one 8 foot length aluminum angle 1/16 x 3/4 (from hardware store sheet metal section) (~$11)

*machine combo screw/nut round #6 32 x 3/8” (10 per screen: 1 box of 100 ~$5)

*drill with a corresponding drill bit for selected screws; optional reamer bit 

*phillips head screwdriver

*hacksaw

*measuring tape

*marker 

*sandpaper

*scrap wood for drilling block

*safety goggles, duh

sheet metal section
This is what the sheet metal section looks like.


Step 1: 

Take your 8 foot length of aluminum and measure & mark four (4) 16" lengths and four (4) 8" lengths. Use your hacksaw to cut these marked lengths.  

Remember, this is making two barriers. If you're only making one barrier, use a 4' length to start and cut half the amount of pieces. This is full customizable to any size or amount needed -- Play around and have fun!


Step 2: 

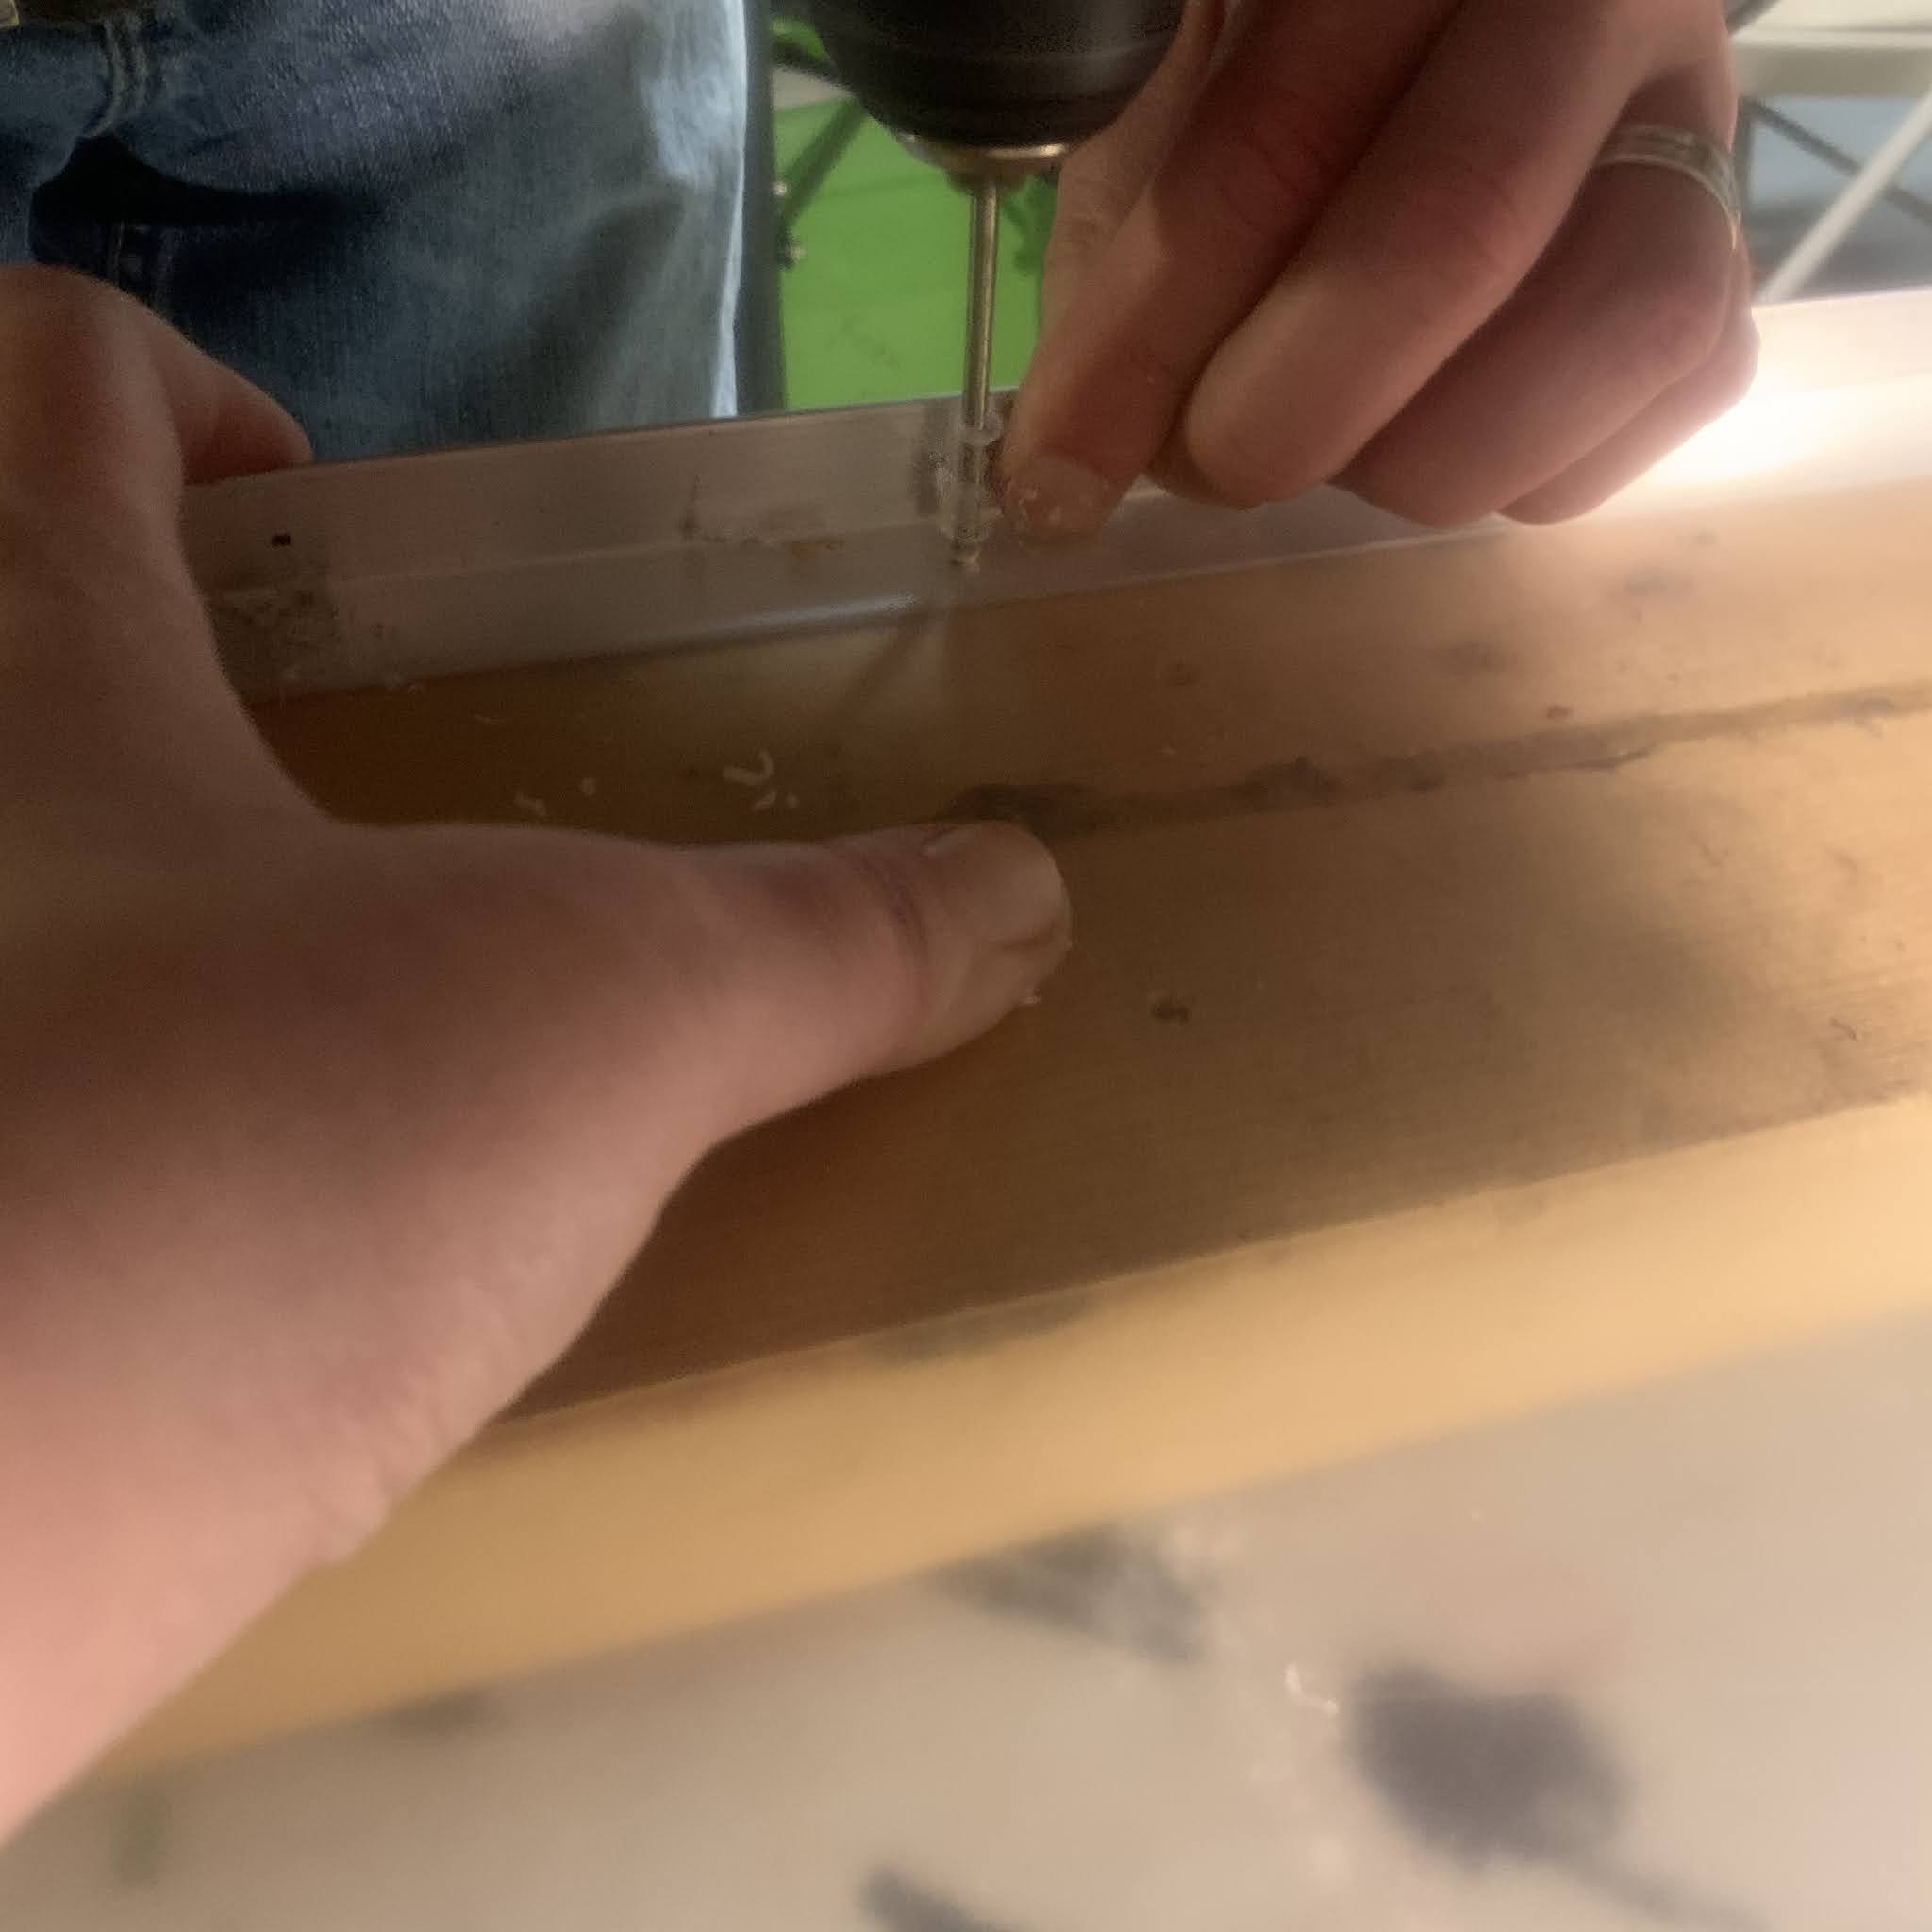
We're going to start drilling holes for feet -- for the left side, put the end of one 16" length perpendicular to the center of one 8" length. *Keep in mind that you want the foot (8") to have its L angle facing like a proper L for this side.  The interior upright 16" length should have one side touching the interior outer edge of the foot and its other side furthest away from you. With these sandwiched together on the side and on top of your scrap wood, drill a hole in the center of their meeting point.  Attach screw from the outside and nut on interior.

Repeat MIRROR IMAGE orientation with to create the right side. 


Step 3: 

We're going to start drilling holes through the side uprights to hold the plexi on. We wanted to have a pass-through opening on the bottom that would fit a box of Girl Scout cookies so we gave a 3" clearance.

From the bottom of both 16" uprights, on the L angle furthest from you, measure 3" upwards and mark with a line, continue to measure up every 3" with a dot in the center of the aluminum. Repeat on the right side aluminum.  

Peel protective film from left and right side of plexi, front & back. Put wood blocks under each metal side, then lay your plexiglass flat on top of marked legs, with the bottom edge sitting on the line drawn towards the bottom.  You will now drill through the plexiglass and the aluminum at the same time- hold tightly and drill, using a reamer to give yourself a cleaner hole.

Insert screws from the customer-facing edge (easier to do when you hang it over the edge of your table and screw from the floor upwards) and your nuts on the interior side that you drilled from.

Repeat on other side.

You're done! Just peel the rest of the protective film off and you're ready to use it!


I added green painter's tape to the edges to make it more visible and a clear indicator that your girls are taking precautions.  Have them decorate it with your troop number, sales pitches, and cookie images!

If you know of local Auburn/Mechanic Falls/Poland/Minot Maine businesses that would like to host us for a drive thru COVID-safe Girl Scout cookie booth in April, please let us know! Or if you’d like a virtual party for your business, let us know! We do contactless drop off throughout the local area.

Tutorial: Stick & Paper Bow and Arrow Craft for Kids


Easy Supply List & FUN Stick and Paper Bows and Arrows for Kids
I recently started volunteering as a leader for Girl Scouts of Maine and I have the best group of Daisy girls! It's been really fun to hear about what they want to learn & discover in their girl-led adventure! I thought this would be a good chance to revive my blog and share these activities & crafts because I know I search non-stop online for ideas of my own.

So our new troop was only able to meet a handful of times in-person before COVID-19 hit and we were all staying safe at home.  I knew immediately that I wanted to offer the girls a sense of normalcy by continuing our meetings with their new friends. What it truly did was provide ME with a sense of normalcy and I'll forever be grateful for that!

Our Goal List of things to explore
So at one of our Zoom meetings, I asked the girls what they would like to learn about and focus on for future meetings so that I could line up some activities.  I wrote their ideas on post-it notes and stuck them behind me on my window during the meeting and they've remained there so I can keep working towards their goals.  The absolute #1 to-do on their list was ARCHERY! Oh, they were so excited and really wanted to accomplish archery.  I know that it is always a very popular activity and that it's hard to work towards that goal since they are Daisies and are not allowed to do this activity for safety reasons (in our council it is Brownies and up). 

So, I brainstormed and found all sorts of great instructions on making fake (aka "safe") bows and arrows out of craft supplies like Popsicle sticks and even recyclables and pool noodles.  My bigger challenge was finding one that could be made from materials they might already have at home since going out during COVID-19 was not an option. Plus, I wanted to make sure it was easy enough to be able to make together virtually. So---- stick and paper bow and arrows!

Each girl was able to pull together some form of these supplies

So simple material-wise. I emailed the following list of materials to have on hand for our meeting:
  • (1) 12 inch & (2) 6 inch sticks from your yard -the longer one should be slightly bendable
  • yarn or string
  • construction paper or paper
  • tape
  • craft/real feathers or pine thistle
  • scissors
We started with a safety lesson.  Even though these are sticks and paper, there still are safety precautions that I wanted them to know about archery in general and sending any type of projectile in the air, no matter what it's made of.  I found some great guidelines here and taught them the basics before we started our craft because once a bow and arrow is made-- THEY WANT TO START USING IT! Lol I told them that after we are done making it, we would review the rules one more time -why? Yes, they already knew that answer! Like I said, they's an awesome group of girls!

The parents were available to help the girls with assembly and this is what we did:
Take your large stick and about 20" of string or yarn. Tie one end of the string to one end of the stick, leaving about an inch of the stick exposed and a short tail of the string hanging. Then wrap the string around the stick in that same spot a few times.

Tie off with the tail of the string and knot twice.

Extend the rest of the string to the other end of the stick and tie in a new knot while slightly bending the stick and holding tension against the string. This can get a little tricky but there isn't really a wrong way to do it. As long as there is some tension, their bow will work. Make sure knots are placed on the same curved side of the stick.

Place your knot, wrap extra string around a few more times and knot twice again.

Ta-da! You now have a bow! We took some time to decorate our bows with washi or painter's tape, paint, etc and then tied or taped our feathers and other decorations to the bottom of the stick for fun.

Now, take your smaller stick- we're going to make an arrow. Bonus points if you can find a stick with one end branched out like this! It makes for a super-dooper nock on your arrow. If they do not have this, please ask their parents to use a scissor or knife to cut a small notch at one end of the stick. This is what will sit in the string of the bow and help the arrow propel.

Now take a piece of paper and cut out two triangle shapes. The girls had some tricks of their own to make two triangles the same size with one cut. I folded over a piece of heavy stock paper, drew a line from the the original corner (now on the bottom of the flap) to the fold. Then cut along that line.

That will give you a triangle with one folded side, this will help attach your arrow but isn't necessary. If you have two seperate pieces then just tape them to the front point of your arrow branch.

If you did use this method, then open up your arrowhead fold and place the stick at the point...

...and then tape it down on the inside of the arrowhead.

Fold flap down to join triangles with the stick sandwiched and taped in place and then tape on both open edges. -- you now have an attached arrowhead that's pointy but not too sharp!

Take that nocked side of your arrow and attach the feathers and/or thistles to the end with tape. This is called the fletching and gives the arrow aerodynamics. It will fly without it but the fletching will help it go further. They can decorate their arrow shafts with tape and paint, too.

NOW YOU ARE DONE!! My girls each made two arrows and one bow so continue to make one more arrow if you'd like.

After reviewing the safety and whistle rules again, I then took a camp whistle and used it to signal looking around us for safety and nocking our arrow, then firing our arrows, then retrieving them safely.  It was SO.MUCH.FUN! They were giggling and having a great time learning how to take a shot. And they really do work! Mine went about 9 feet without trying too hard.  We shot them randomly a few times and then we drew targets on paper/whiteboards and tried out our aim.

I highly recommend doing this virtually and when we're back in-person.  It was so much fun and all from materials easily found in our backyards and with minimal normal craft supplies. And best of all, we were able to accomplish their #1 girl-led goal! GO TEAM!


Powered by Blogger.