Archive for 2012

More CSA work in progress


I don't know where I'd be without the help of my husband-- in general and in framing support, too!  He's cut mats and framed all of the work for the CSA show and I am so happy that he loves doing the technical work because it's just too fussy for me.  Give him things to measure and cut and he's a happy fella.  But don't worry- I help him plenty with the photography for his Etsy shop.  So let's call it sort-of-even!  (I still think I've made out on this deal)


I'm still chugging along on creating new paintings for the upcoming shows and I think I'll just keep making work beyond any exhibition dates.  I've purchased many panels to paint on and have gessoed a whole bunch of them.  I love painting on a freshly gessoed board!

Final CSA Shows and New Work

Our cabbage paintings side-by-side
I love how in-sync we were this month! Working on new paintings at our own homes without talking about them at all, we wound up using the same subject matter!  Kim and I had looked at the cabbage growing on the farm in October but hadn't painted them until this week.

Kim and I have been working non-stop on the CSA project-- we have our 3 final shows coming up in January!  With the addition of those new exhibits to the 2 already on display, we'll be showing in 5 places at the same time (!!!).  Hectic, but a nice problem to have as an artist.  It's really made me be very productive so that I have a fresh supply of new work not only to give to the venues, but to be excited about and share via the blog and Facebook.  It would be boring to me to ask people to come out to a new venue to see the same old work no matter how cool I think it is :)

So, here's the newest work so far-- they can be found at the following venues on the following dates -- think of it like an Easter egg hunt:
Savory Maine Dining and Provisions, Damariscotta, ME through February 5, 2013
Crosstrax Neighborhood Deli, Unity, ME through January 26, 2013Maine Farmland Trust, Belfast, ME January 4-February 27, 2013 (opening 1/4 5-8pm)
University of Maine Hutchinson Center, Fernald Gallery, Belfast, ME January 4-February 27, 2013 (opening 1/4 5-8pm)
Frontier, Brunswick, ME January 11-February 24, 2013 (opening 1/11 5-8pm)

My newest paintings:
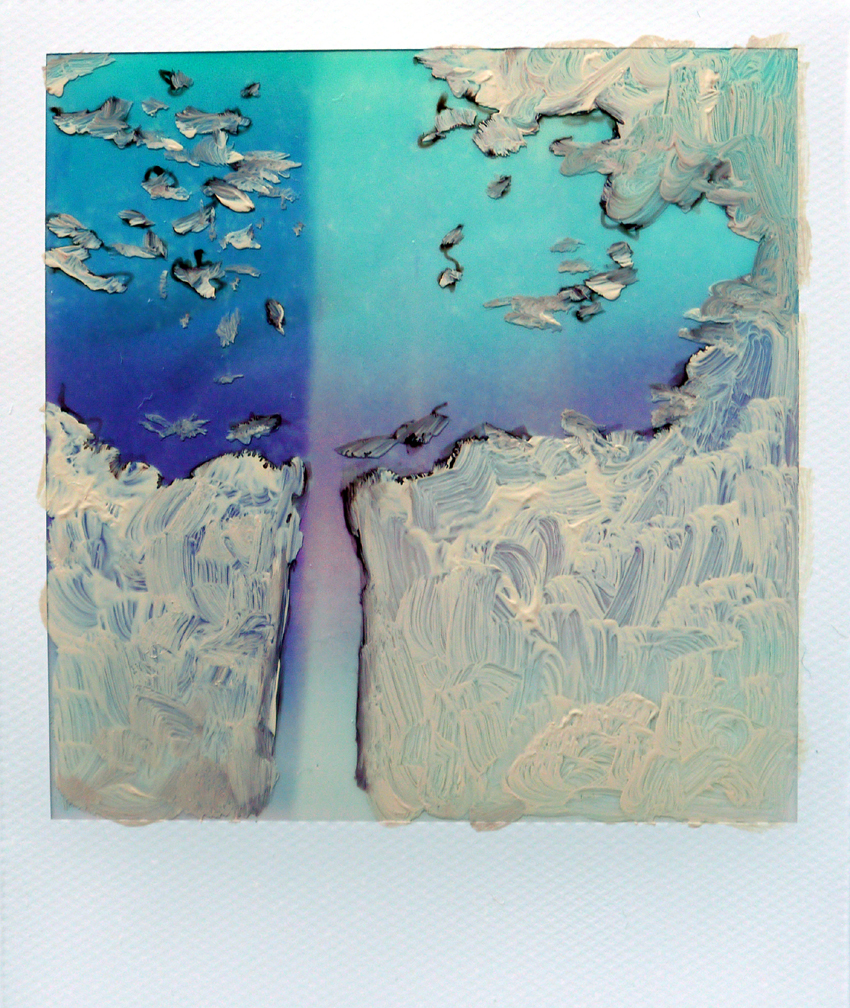
It Was Always Waiting There, Casein and Wax Pastel, 18" x 18", November 2012
Do Over, Casein and Sharpie, 18" x 18", November 2012

End of the Day, Acrylic, 18" x 24", October 2012

On Display, Casein and Graphite, 18" x 24", October 2012

Cabbage Patch, Casein and Wax Pastel, 18" x 18", December 2012

And Kim's newest pieces:

Cabbage in the Grass, Acrylic and Sharpie, 12" x 14"

Vegetables in the Barn, Watercolor and Graphite on Canvas, 11" x 14"

Barn House, Acrylic, 11" x 14"

SOLD! - Guard Dog, Acrylic and Wax Pastel, 6" x 6"


Cover Crop

Cover Crop, Woven Photo Transfers on Cloth with Embroidery, 23" x 11"
As I wrote about in my first post about the CSA project, Kim and I have been looking for a way to make a woven item that included our photographs.  We experimented with some ideas and even made a complete weaving only to take it apart because it didn't have the feeling that we wanted.  Originally, we thought we would make two separate pieces and show them side-by-side.  But we didn't have one collaborative piece to exhibit for this show and then realized we should combine our two ideas into one collaborative piece.  Literally weaving our ideas and experiences together. 


This piece started by transferring our photographs of the farm onto wide strips of fabric that we picked up at Goodwill.  Kim did some beautiful embroidery on her fabric strips which became the weft.  For my transfers, I wanted to focus on the amazing textures that I was seeing on the farm.  This included weathered wood shingles on the barn, hay in the field, and worn wooden siding on the cottages. These primarily became the warp but also filled in between Kim's pieces as the weft.


To finish it off, we sewed it onto a backing fabric and made sure that the last few rows were just of the hay field.  It sort of speaks to how everything on the farm grows out of or feeds off of the fields.

Pasture Pie Party

This past Friday, Kim and I headed over to the farm to work and happened upon the first official Pasture Pie night!  The pizza oven was fired up and CSA customers were invited over to share in the fun.  They went into the garden and picked their own fresh basil to add to the farm made cheeses.  The also made a lovely raspberry, mint, and honey iced tea.  It was a really beautiful night to enjoy fresh food and great company.

Domes and angles

I went back to the farm on the 4th to see the progress of the clay pizza oven...it's coming right along!! Fully modeled and the opening has been carved out with some wooden supports to keep the shape while it completely dries.  It looks as though they've lit a few small fires in it to dry the inside at the same rate as the outside.  I can almost taste the pizza!!

Pizza Oven I, Acrylic & Ink on Instant Film, 3x3"
I've found myself becoming very fond of the architecture on the farm and this new structure was no exception.  Already finding its way into my work and a way to document this exciting new addition to the farm which will tie them even closer into their community (Pizza Party!!).  

Apex, Acrylic & Ink on Instant Film, 3x3"

Continued with another painted instant film image of the barn.  After a great artist's meeting at the Harlow tonight, I've been inspired to attempt some larger versions of these pieces.  I love the intimate size of these current ones but think it would be nice to work in a slightly larger size, as well.


Kabobs
Also wanted to share these images of some of the meat I've been enjoying from Wholesome Holmstead.  I picked up a package of kabob meat and we had more than enough for 4 people.  SO tasty!!  We put onions and red peppers on for 3 of us and, for mine, I put granny smith apples and broccoli.  YUM!!

We've been barbecueing every night with meat and chicken from the farm (and the bacon...OH THE BACON!!)

Building a clay pizza oven


I returned to the Wholesome Holmstead farm last Saturday to observe the clay oven workshop.  The plan was to have an open invitation for people to come and help them build a small clay pizza oven.  They had put the word out to their friends, family, and customers, and community...and what a jovial bunch showed up!  All ready to get their hands dirty and spirits lifted.

They gathered around a mound of clay and sat on buckets and dug right in.  The 'bricks' they were making started as palm-sized balls.  "Are you making cannon balls?" I said with a laugh as I walked up to this scene of pyramids of round clay stacked high.  I guess it was an arsenal of sorts, but not for hurling at enemies.  Rather, it was for throwing at the mound of sand that was the form for the oven that is going to be the center of many a fine gathering of friends and neighbors.


About a week before they had a mason come in to pour a cement base.  And today, before I arrived, they had laid fire bricks over the base and created a mound of sand on top of it.  This was to be the form of the oven-- a dome (one of the finest structures in the world, if you ask my husband--I tend to agree!)  We arrived in time to watch them make a bunch of bricks and then start compacting them against the sand form.  Once they had all the bricks arranged and troweled for shape, they were going to cut the hole of the oven's opening and dig out all of the sand, leaving behind a hollow form, ready to dry out and become their oven.


I plan on going back this week and seeing the finished product. I'll definitely report back on that and also let you know when the first firing and pizza party is!  They're going to make pizza with their fresh veggies and meat-- I can't wait to try some! 

Re-imagined

Kim's painting of the WH sign
Kim and I had planned on going back to the farm on June 23rd to help them build their pizza oven...but nature had other plans! Heavy rain was in the forecast so the farm rescheduled for the following week.  But we figured we would get a few hours in before the droplets started so we packed the car and headed to a shady spot in the grass.   It turned out to be very hot before the rain started but we stuck it out for a couple hours to paint.

Kim wanted to paint the Wholesome Holmstead sign that sits at the opening to the driveway at the farm stand.  This is the first piece she made- mixed media on paper, 9x12"

Just Like Home, 
Acrylic & Casein, 10" x 10"
I'm still fascinated with all the structures on the land.  This time I focused on the silhouette of the house.  The structure and layout of this building is really similar to my house, which used to be a farm back in the day.  I think that's why I'm so drawn to it.  This is a smaller painting (10x10") that I had started in the studio for a different purpose but it just wasn't jiving.  So I decided to take it along and paint on top of it.  This piece ties in my painting with the monotype imagery I've been working on.
 

To take a break from the paint and explore the farm some more, I walked towards the area where the pizza oven was going to be.  Behind it, I found one of the red barns that I love so much and leaning up against it was a beautiful wooden apple ladder.  It appears to be old and I imagine it's been used on the farm for decades...maybe just my imagination but I like to think that!  I had some old Polaroid cameras with me but the experimental film inside of them just wasn't capturing what I was seeing through the lens.  TTV was the next best thing so I made an intricate set up of a milk crate and cameras stacked on top of each other to steady the image.

 
When I got back to the studio I monkeyed around with the instant film images that were not developed correctly.  Some were too light to be anything or had thick blue lines through them or patches of undeveloped film.  (I've been using Impossible Film and some are breathtaking in the experimentation yet others are frustrating.)  Taking some ink and acrylic to the film, I recaptured the images and, in some cases, re-imagined what was there.


More barns!


Had another great night making monotypes.   I really loved the image of the big barn from the day before, but I wanted to flip the composition.  I loved the result and so I made one more (so far).  In the second one, I added red to give more dimension and a hint of the color in real life.


I also worked on a smaller one (the small one measures 5x10" and the larger ones are 10x10") which is an A-frame type barn.  There aren't any of those on the farm but I was thinking of the cattle barn in the color choice, teal! haha That's mixed into the gray and is a bit more apparent in real life print.


 ....

Read more about the project here: http://csaart.org/


If you have a few dollars you'd like to donate to this project, please visit our Indiegogo page-- the thank-you presents begin at the $10 level!  http://www.indiegogo.com/CSA-Community-Supporting-Arts

Pulling more monotypes


Hit the studio today making more monotypes for the CSA Project at the Harlow Gallery.  Like the last set I was working on, I'm really digging the look and feel of this process.  My husband taught me a method for monotypes using water soluble Speedball ink on a plexiglass plate.  I played around with it and really found that I liked covering the entire plate in custom color mixed ink and then using a reductive method of drawing my image in.  I'm finding that it leaves an almost ghostly appearance which matches the hazy memories I'm working from (as well as the instant photographs to jog the brain).


CSA project update

I've been neglecting my blog (as most bloggers do) but it's not because I have nothing to say.  Quite the contrary, I have much to say but I've been blogging on the CSA project website and not here!  Shame on me!  So here I'll cram it all into one post and then I promise I'll keep posting here at the same time.  I mean, I know you worry.  I'm ok, really.  ....

By the way-- if you have a few dollars you'd like to donate to this project, please visit our Indiegogo page-- the thank-you presents begin at the $10 level!  http://www.indiegogo.com/CSA-Community-Supporting-Arts

One feeds the next

On our first visit to Wholesome Holmstead farm in Winthrop, I had taken this photo of one of the buildings on the farm. The color of this barn with the pile of branches in front of it inspired the color and composition in this new painting. I don't usually paint with a reference but, for this CSA project, the image just kept coming back into my mind. It's a small painting; casein, acrylic, and wax pastel on mounted paper.


painting on site

Pāscō
I feed, nourish, maintain, support

I happened upon a weekend that was absolutely gorgeous.  The sun was shining, the seedlings were being planted in the dirt, and the cows were grazing in the pasture.  They were only a little curious as to my presence but turned their heads back to the green grass, as did I.  I was told a few times that these girls could be quite inquisitive but, on this day at least, we chose to observe each other from afar and be content with the warm air and bright colors of the day.  I set up in the grass and painted them from behind the stone wall of their enclosure.  This one is entitled "Pāscō" - the definition which, in translation from Italian, means 'I feed, nourish, maintain, support.'


Working on site

Kim and I returned to Wholesome Holmstead farm with a car full of art supplies, ready to have a day full of monotypes.  

We first set out to photograph our muses and then set up our day studio inside the farmhouse with a drying station by the window.  We were both inspired by the pair of tiny cabins/cottages and made a stack of monotypes and photographs of our day's adventure. 

Definitely an inspiring day.
Kim's output for the day - monotypes

My monotype series

Impossible film (Polaroid)

our prints drying by the window

CSA Project started


My friend Kim and I were accepted to a very exciting project with the Harlow Gallery in Hallowell, ME called CSA - Community Supporting Arts.  We were paired with a local farm, Wholesome Holmstead of Winthrop, ME,  and we are going to create a body of work based on our inspirations from the farmland, the farmers, and their community interaction.  We've visited the farm twice so far and have been having an amazing time.

We went back today, hoping to spend all day on the farm painting and taking photographs, but today's temperature and wind was just too much for us to handle!  We literally only lasted 10 or 15 minutes outside. We couldn't feel our fingers after taking our photo adventure.


So we went to the farm stand to purchase some food to take back to my warm studio and ran into our farmer who taught us about cheese making.

Kim's a great fiber artist and recently taught me how to weave. We first bonded with each other about being photographers so we thought this was a great way to combine our interests and connections. The idea is that we'll take tons of photographs over the seasons, focusing on how the farm and farmers are woven into their community. (all puns intended)   Our first joint effort -- a prototype/work-through sketch of a fiber and photography project we have in mind. These are photo transfers of farm images we have taken so far.  


Using Caran d'Arche Neocolor II pastels

Caran d'Arche Neocolor II water soluble wax pastels

I've been asked a few times to explain what these wax pastels are that I've been using lately.  They are Caran d'Arche Neocolor II water soluble wax pastels, also called Aquarelle Artist Pastels.  Now, be sure that you're buying Neocolor II and not I-- Neocolor I pastels are water resistant.  they still do very cool things but under different circumstances and with different media.  I've been using the NII pastels in mixed media pieces, mostly with casein and acrylic paint.  


In the images above, I simply scribbled some NII into the areas that I wanted to use as a thin paint. The pigment in the pastel is so concentrated that it really works well either on its own or blended into other paint.  If you're working on top of casein, the water will reactivate the paint and your colors will blend.  If you are working on top of acrylic, as I am here, then you will make semi-transparent layers of paint on top of your color.  Use it on its own for a nice underlayer of color.

You can also lay down some paint and, while it's wet, use the NII to scratch into the paint to reveal the colors underneath. Vary the heaviness of  your hand to reveal deeper layers.  Things get interesting when the color from your NII is left behind in your marks.  If you want to increase the likelihood of this happening, wet your NII before drawing. 

 
I like to paint/draw/paintover/draw/paintover/draw/paintover ... until I feel like it's done.  This is the beginning of a small painting I'm working on but thought it was ok enough to share for purposes of explaining the Neocolor II pastels.  

It's hard for me to pass up a colorful art supply I come across-- I'm glad that I picked these up to experiment with!

The Chicken Chick

Powered by Blogger.